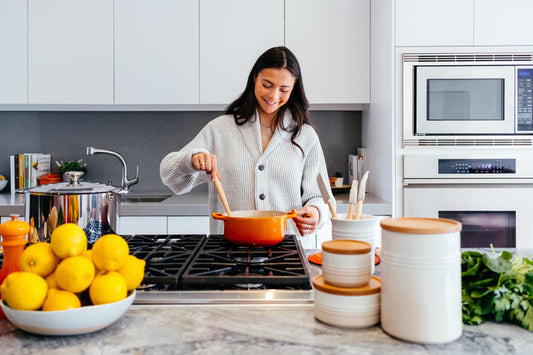
EBikes enable riders to go faster and further than riders on "analog" bikes. As you explore longer rides that take you further from home, you'll need to re-fuel your body on the road or trail. Making your own bars or muffins can not only save money but can also taste better and are fresher. Also, you can make recipes that include ingredients and flavors you prefer.
Many of the recipes below are super easy to pack for snacks throughout the day. They are a great snack before your bike ride or you can take them with you on your bike ride in a jersey pocket, handlebar, or saddle bag.
In this article:
- Healthy ingredient ideas
- Blueberry banana muffins recipe
- Homemade granola bars recipe
- Homemade date and cashew bars recipe
Healthy ingredients to consider:
Oats
Oats are an excellent grain for almost anyone since they are also gluten free. They are a great source of protein; containing about 13 grams in 1 cup of cooked oats. Oats are also a good source of fiber which can help reduce total cholesterol levels and help decrease blood sugar.
Pumpkin
Pumpkin contains several vitamins and minerals, one of which is beta carotene. Your body turns this carotenoid into vitamin A which is important for good eye sight. Vitamin A, along with Vitamin C which is also found in pumpkin, can strengthen your immune system. Making your own pumpkin puree from fresh pumpkins is great, but the canned pumpkin is also a great choice. However, make sure you purchase pumpkin puree and not pumpkin pie filling which has a lot of added sugar in it.
Blueberries
Blueberries are one of the most nutrient dense berries. Blueberries contain some of the highest antioxidant levels among all of the fruit and vegetables. These antioxidants are essential in protecting against free radicals that can damage your DNA, which can cause cancer and accelerate aging. Frozen blueberries are also a great option when fresh are not in season.
Walnuts and Cashews
Walnuts and cashews are a great source of protein; a handful provides around 4-5 grams. They contain unsaturated fats, also known as heart healthy fats, which can help reduce the risk of heart disease.
Healthy recipes for eBike riders
Blueberry Banana Muffins
I love these muffins because the blueberries contain plenty of antioxidants but also make the muffins moister. The bananas are a great source of natural sweetness and carbohydrate. The walnuts can be left out to make a nut free version.

Yield: 12 large muffins
Ingredients:
- ¾ cup (180 mL) mashed ripe banana (about 2 medium)
- ¾ cup plus 2 tablespoons (210 mL) milk of choice
- 1 teaspoon apple cider vinegar
- ¼ cup (60 mL) maple syrup or honey
- 1 teaspoon pure vanilla extract
- ¼ cup (60 mL) coconut oil, melted
- 2 cups (280 g) flour (I use half whole wheat, half all purpose)
- 4 to 6 tablespoons (40 to 60 g) sugar depending on taste and ripeness of bananas
- 2 teaspoons baking powder
- 1 ½ teaspoons cinnamon
- ½ teaspoon fine grain sea salt
- ½ teaspoon baking soda
- ½ cup (50 g) walnuts or nut of choice, chopped optional)
- 1 ¼ cups (160 g) frozen or fresh blueberries**
Directions:
- Preheat oven to 350°F and grease a muffin tin.
- In a medium bowl, mash bananas and measure out 3/4 cup. If you have any leftover mashed banana you can freeze it for a smoothie.
- Place mashed banana into medium bowl along with the milk, vinegar, maple syrup, and vanilla. No need to stir it yet.
- Melt the coconut oil in a small pot over low heat. Set aside.
- In a large bowl, mix together the dry ingredients (flour, sugar, baking powder, cinnamon, salt, and baking soda).
- Stir coconut oil into the wet mixture. Pour wet ingredients onto the dry ingredients and stir until just combined.
- Gently fold in the walnuts and then the blueberries, being sure not to overmix as this can result in dense muffins.
- Spoon a heaping 1/4 cup of batter into each muffin tin, filling each tin about 3/4 full (they will be almost full, but this is normal). I like to press a few extra blueberries on top of each so they look pretty after baking.
- Bake at 350°F for 23 to 27 minutes until a toothpick comes out clean. I baked them for 25 minutes.
- Cool in pan for 5 to 8 minutes and then transfer muffins to a cooling rack and cool for another 15 minutes.
** If using frozen blueberries, be sure to leave them in the freezer (do not thaw) until just before you stir them into the batter. This helps prevent bleeding.
Emily’s Tips: For a gluten free version try ¼ cup flax meal, ¼ cup arrowroot starch, ½ cup buckwheat flour, ½ cup almond flour and ½ cup coconut flour in place of the flour.
Homemade Granola Bars
The base of these bars are oats which are extremely nutrient dense and provide carbohydrates, fiber, and protein along with several vitamins and minerals. The hemp seeds in these bars are rich in healthy fats and a great source of protein.

Yield: 14-16 bars
Ingredients:
- 1 ½ cups (360 g) pumpkin puree
- 1 teaspoon (5 mL) pure vanilla extract
- 2 cups (200 g) gluten-free rolled oats
- ½ to ¾ cup (60 to 90 g) dried cherries, cranberries, or blueberries, to taste*
- ½ cup (50 g) walnuts, chopped
- ½ cup (75 g) sunflower seeds
- ½ cup (80 g) pumpkin seeds
- ½ cup (60 g) sliced almonds
- ¼ cup (35 g) hemp hearts
- 1 teaspoon cinnamon
- ¼ teaspoon fine sea salt
Directions:
- Preheat the oven to 350°F. Lightly grease a large rectangular baking dish (approximately 9" x 13") and line with a piece of parchment paper (with overhang) so the bars are easier to remove.
- In a large bowl, mash the banana until smooth. Make sure you have 1 1/2 cups (if you have extra mashed banana, you can freeze it for a smoothie).
- Stir in the vanilla.
- Place the oats into a food processor (or blender set on the lowest speed) and pulse until the oats are coarsely chopped (but still have lots of texture). Stir the chopped oats into the banana mixture until fully incorporated.
- Stir the dried fruit, walnuts, sunflower and pepita seeds, almonds, hemp hearts, cinnamon, and salt into the banana-oat mixture until thoroughly combined. The dough will be very heavy and a bit wet.
- Spoon the mixture into the prepared dish. With lightly wet hands, smooth out until even and uniform. Press down on the dough until compacted.
- Bake for 22 to 26 minutes, until firm and lightly golden along the edges.
- Place the dish on a cooling rack for 10 minutes, then carefully slide a knife to loosen the ends and gently lift out. Place the slab on a cooling rack until completely cool.
- Once cool, slice into bars. Leftovers can be wrapped up and stored in the fridge for a week, or stored in the freezer for 4 to 6 weeks.
* You can omit the dried fruit and sub in chocolate chips (or add a mix of both).
These bars aren't super sweet, so if you prefer something sweeter you may want to add a touch of sweetener.
To store these in the freezer, wrap the bars individually in parchment paper using 6-inch by 12-inch pieces of parchment, then tie with string or tape to secure. Finally, place all of the bars into a freezer-safe zip bag, press out all the air, and seal it shut. Or, you can simply wrap each bar with plastic wrap or tinfoil.
Emily’s Tips: Try substituting the pumpkin with about 3 ripe mashed bananas!
Homemade Date and Cashew Bars
These bars resemble Lara bars but can be made in bulk at home! They are gluten free and vegan. I usually double the recipe and freeze the extras. You do need a decent food processor to make these. The dates are a great source of carbohydrates, potassium and iron. The cashews provide a combination of protein and healthy fats which is great for sustained energy.

Yield 10-12 servings
Ingredients:
- 1 ½ cups (230g) raw cashews
- 1 cup tightly packed pitted Medjool dates (190g)*
- 1 teaspoon pure vanilla extract
- 1 to 2 teaspoons water, if needed
- ¼ plus 1/8 teaspoon fine sea salt
- 3 tablespoons mini chocolate chips (regular size chips work too)
Directions:
- Add cashews into a food processor and process for 3 to 4 seconds, until a coarse meal forms.
- Add in the pitted dates and vanilla. Process until the mixture comes together, for about 15 seconds, or longer if needed. The mixture should stick together easily when you squeeze it between your fingers. If it doesn’t stick or it’s still a bit crumbly, add a very small amount of water (1 teaspoon at a time) and process it again. I usually add between 1 to 2 teaspoons of water.
- Finally, add the salt, to taste, and the chocolate chips, and process briefly to combine.
- Line a loaf pan or an 8-inch square pan (or 9x5 inch loaf pan for thick squares) with a piece of parchment paper so that there's overhang to lift out the bars after freezing. Scoop the mixture into the pan and smooth out with your hand until it’s level. Push down firmly all over the mixture. The more you pack it down the better the bars will hold together. Roll out with a pastry roller if you have one.
- Freeze, uncovered, for at least 15 to 20 minutes and then slice into bars. For on-the-go, wrap bars in plastic wrap or tin foil and store in the fridge or freezer. I prefer these straight from the freezer.
*If your dates are stiff or dry, soak the dates in boiling water for 30 minutes before beginning. Drain well and quickly pat dry before use
Emily’s Tips: I recommend buying the cashews and dates in bulk if possible to cut down on cost.